Adding a List Box to a User Form
One of the most powerful ways of controlling the way your application is run is by using Dialog boxes and User Forms.
They force the user to respond and limit the way they can interact with your application.
When combined with other user friendly objects, such as List boxes they help to create a professional looking application.
Although slightly more complicated to develop this results in a much more robust User Interface.
Creating a List Box on a User Form
We will build a User Form with a List box that will allow the user to select a state and display the result in a spreadsheet cell.
On Sheet 1 fill the cells A1:A8 with the names of the States.
Switch to the Visual Basic Editor
From the menus select Insert User Form
This will create a new User Form.
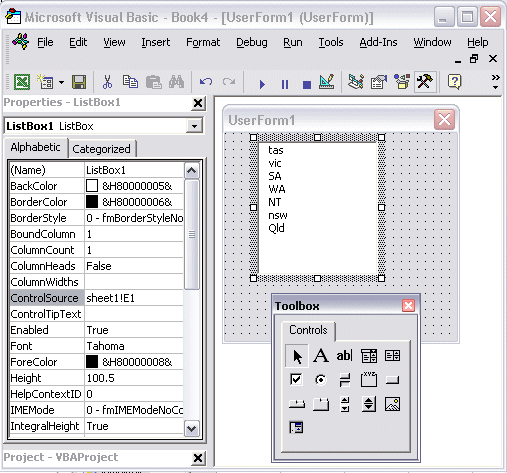
Use the Toolbox to add a List box as shown below.
Filling the List Box on the Dialog Sheet
To fill the List box with the State's names make sure the listbox is selected and find the RowSource property in the properties window.
Enter Sheet1!A1:A8
(It is a good idea to include the sheetname.)
We can use the ControlSource property to send the details of the State selected by a user to a cell on the spreadsheet.
With the listbox still selected, set the Control Source to Sheet1!E1
Deselect the List box by clicking elsewhere on the form.
Click the Run button or select Tools Run from the menu bar to execute the Form .
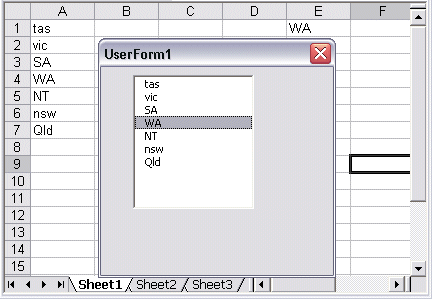
Click on a Listbox item and the item should appear in cell E1.
Use the Close button (X) to remove the Form